The importance of a well-structured Revit template cannot be overstated. A Revit template serves as the foundation for all your projects, ensuring consistency, efficiency, and accuracy. A well-crafted template can save you and your team a significant amount of time and effort, allowing you to focus on the creative aspects of your work.
In this article, we will delve into the essential components of a perfect Revit template and provide you with a step-by-step guide on how to create one. Whether you're a seasoned Revit user or just starting out, this article will help you optimize your workflow and take your projects to the next level.
Understanding the Importance of a Revit Template
A Revit template is a pre-configured project file that contains the necessary settings, families, and data to get started with a new project. It's a critical component of any Revit workflow, as it allows you to establish a consistent look and feel across all your projects.
A well-designed Revit template offers numerous benefits, including:
- Consistency: A template ensures that all your projects follow the same formatting and structure, making it easier to navigate and understand.
- Efficiency: With a template, you can avoid starting from scratch every time you begin a new project, saving you and your team a significant amount of time.
- Accuracy: A template helps reduce errors and inconsistencies by providing a standardized framework for your projects.
Essential Components of a Perfect Revit Template
So, what makes a perfect Revit template? Here are the essential components you should include:
- Settings: Establish a consistent set of settings, including units, precision, and formatting options.
- Families: Include a comprehensive set of families, such as doors, windows, and furniture, to ensure that all your projects have access to the same elements.
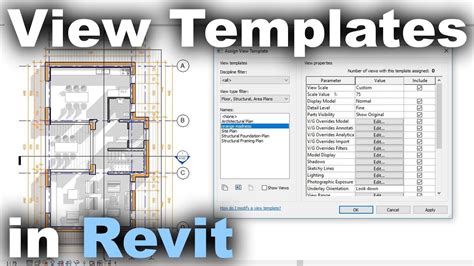
- View Templates: Create view templates to standardize the look and feel of your views, including floor plans, elevations, and sections.
- Schedules: Include schedules to help you manage and track data, such as room schedules and door schedules.
- Content: Add relevant content, such as images, symbols, and annotations, to enhance your projects.
- Coordinate Systems: Establish a coordinate system to ensure that all your projects are accurately located and oriented.

Creating a Perfect Revit Template
Now that we've covered the essential components of a perfect Revit template, let's walk through the step-by-step process of creating one.
Step 1: Set Up Your Template File
- Start by creating a new Revit project file (.rvt) and save it as a template file (.rte).
- Choose a name for your template that reflects its purpose, such as "Architecture Template.rte."
Step 2: Configure Settings
- Go to the "Manage" tab and click on "Settings" to access the settings dialog box.
- Configure the following settings:
- Units: Set the units to the desired system (e.g., Imperial or Metric).
- Precision: Set the precision to the desired level (e.g., 1/16" or 1 mm).
- Formatting options: Set the formatting options for dates, times, and currency.
Step 3: Load Families
- Go to the "Insert" tab and click on "Load Family" to load the necessary families.
- Load families from the Revit library or from your own custom library.
- Include a comprehensive set of families, such as doors, windows, and furniture.
Step 4: Create View Templates
- Go to the "View" tab and click on "View Templates" to create new view templates.
- Create view templates for floor plans, elevations, and sections.
- Configure the view templates to include the desired settings, such as scale, grid, and annotations.
Step 5: Create Schedules
- Go to the "View" tab and click on "Schedules" to create new schedules.
- Create schedules for room data, door data, and other relevant data.
- Configure the schedules to include the desired fields and formatting options.
Step 6: Add Content
- Go to the "Insert" tab and click on "Image" to add images to your template.
- Add images, symbols, and annotations to enhance your projects.
Step 7: Establish Coordinate Systems
- Go to the "Manage" tab and click on "Coordinate Systems" to establish a coordinate system.
- Choose a coordinate system that aligns with your project requirements.

Best Practices for Managing Your Revit Template
Once you've created your perfect Revit template, it's essential to manage it effectively to ensure that it remains up-to-date and consistent across all your projects. Here are some best practices to follow:
- Regularly update your template: Regularly update your template to reflect changes in your workflow, new families, and updated settings.
- Use a centralized location: Store your template in a centralized location, such as a server or cloud-based storage, to ensure that all team members have access to the same template.
- Use version control: Use version control to track changes to your template and ensure that all team members are working with the same version.
Conclusion: Take Your Projects to the Next Level with a Perfect Revit Template
A perfect Revit template is essential for any architecture, engineering, or construction project. By following the steps outlined in this article, you can create a comprehensive and efficient template that streamlines your workflow and enhances your projects. Remember to regularly update your template and use best practices to manage it effectively. With a perfect Revit template, you'll be able to take your projects to the next level and achieve greater success.


What is a Revit template?
+A Revit template is a pre-configured project file that contains the necessary settings, families, and data to get started with a new project.
Why is a Revit template important?
+A Revit template is important because it ensures consistency, efficiency, and accuracy across all your projects.
What are the essential components of a perfect Revit template?
+The essential components of a perfect Revit template include settings, families, view templates, schedules, content, and coordinate systems.
